How to change margins in Google Docs on PC, phone, or iPad
The Google Docs editor is among the best-known text-processing programs. With Docs, you can carry out countless adjustments to your document to suit your preferences. Among these is the possibility to customize your text margins to your liking. Figuring out how to change margins in Google Docs is an essential step towards ensuring your document looks aesthetically pleasing.

Source: Facebook
Performing margin adjustment on Google Docs is quite straightforward actually. Here is a everything you need to know.
What exactly are margins?
A document margin is usually the unused space on the top, bottom, and both sides of the document. Typically, this space has no images or text and is meant to prevent content from touching the edges of the document.
In most cases, document margins are set as an aesthetic choice. When text is too close to the edges of a document, it is not appealing to the eyes. Additionally, some printers have limitations that prevent them from printing content too close to the edges.
Margins should never be confused with indents. The latter defines how far a paragraph is from the document margin. This means that if you have a half-inch margin and a half-inch indent, your text will start one inch from the edge of the document.
While it is entirely possible to have varying indents in a single document, you can only have a single margin on one side of a document. If you are an online document editor, you have probably wondered, ‘How do I adjust the margins in Google Docs?’ Well, let us take a look at some simple options.
How to change margins in Google Docs using the ruler

Source: UGC
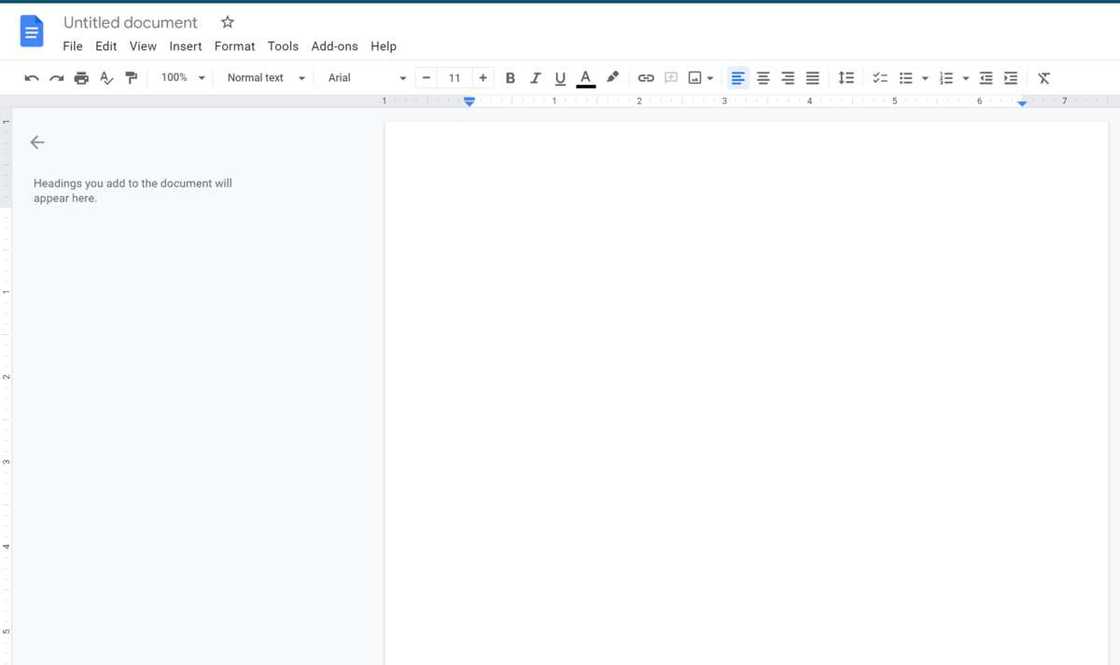
This is arguably the most popular method to edit Google Docs margins. Here is a step-by-step guide on how to go about this.
- Make the ruler visible by clicking on the ‘View’ tab and then selecting ‘Show ruler.’ This step is only necessary if the ruler is not visible on your document.
- Starting with the right margin, position your mouse’s pointer on any point in the grey zone that indicates the document margin.
- You will notice the pointer changes into a bidirectional arrow.
- To edit the margins on Google Docs, drag the grey margin to the left to make it wider or to the right to make it narrower.
- To adjust the margins, you will notice a little blue triangle at the end of the margin alongside a downward pointing rectangular-shaped arrow. This arrow identifies the right indent.
- Margins and indents change concurrently so you might want to reposition indents every time you adjust margins.
- Typically, a Google Document will have no indents. Set these if you need your text to move away from the margin.
- Once you are done with the right margin, repeat the process for the left, bottom, and top margins.
How to adjust margins in Google Docs using the page setup option

Source: UGC
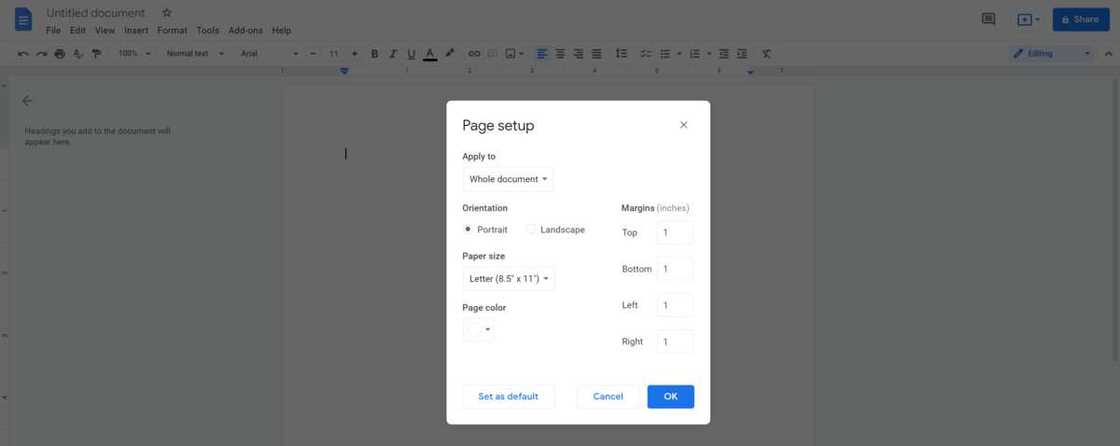
If you know the exact size you need your margins to be, then there is an even easier option than setting them manually. The editor has a ‘Page setup’ option that lets users input margin values into a dialogue box.
Here is a guide on how to edit margins in Google Docs using this method.
- With the document opened, navigate to ‘File’ and select ‘Page setup.’
- Input your preferred margin measurements for the right, left, bottom, and top margins.
- Click ‘Ok’ to save and apply your preferences.
Set default page margins in Google Docs
If you are a regular Google Docs user, you may want to have custom default margins instead of following the above procedure every time you create a document. When you set these, the margins will always be set to your preferences every time you use the editor.
Here is how to set the default margins.
- Create a new Google Doc or open an existing one onto which you would want to apply your custom default margins.
- Click on ‘File’ and then choose ‘Page setup.’
- Input the margin values you want to set as default.
- Click on ‘Set as Default’ and then press ‘Ok.’
How to change margins in Google Docs on phone

Source: Facebook
If you use Google Docs on your smartphone, adjusting margins is a tad different from what you do on PC. Keep in mind that the margin adjustment feature does not appear on Android devices; it is only available on iOS.
Here is how to change margins in Google Docs on an iPad or an iPhone.
- Open your document on the Docs app on your mobile device.
- Select the menu by tapping the three dots on the top right corner.
- Choose ‘Page Setup.’
- Select ‘Margins.’
- Choose among ‘Custom,’ ‘Wide,’ ‘Default,’ or ‘Narrow.’
- Choose ‘Apply.’
The custom margin parameters setting allows you to input values, while the default setting creates one-inch margins all around the document. The narrow setting creates a half-inch margin all around, while the wide setting has 2-inch margins on the side and one-inch margins on the top and bottom.
How to adjust margins for columns on mobile devices
If you regularly work with documents containing columns, you might occasionally need to adjust their margins. When it comes to columns, here is how to set margins in Google Docs.
- Select the format button on the document editor. (The capital A icon).
- Choose ‘Layout.’
- Adjust the arrows next to ‘Column spacing’ to reduce or increase the space between columns.
How to change borders in Google Docs
For people transitioning from Microsoft Word to Google Docs, one of the most potentially confusing issues they encounter is the lack of border editing on the latter. There is no way to create borders on Google’s document editor natively. However, there is a simple workaround.
The trick is to make use of the editor’s table options.
- Set your page dimensions to your preferences.
- Insert a one-row one-column table at the top of the page.
- Extend the table downwards by placing your cursor inside the table and pressing ‘Enter’ repeatedly.
- Adjust the page color to whatever color you would like your border to be.
- Feel free to use the default color or use your own custom one.
- Right-click inside the table you created and pick ‘Table properties.’
- Select ‘Cell background color’ and set it to white.
- Add all the content you need to inside the table.
- Voila! You now have an entire document with a colored border.
Google Docs is undoubtedly among the most popular tools from the company’s Workspace platform. For regular text content creators, learning how to change margins in Google Docs is essential. The methods outlined in this guide should help you do just that whether you are working on a computer or mobile device.
READ ALSO: 4 easy ways to change your Zoom background with pictures
Legit.ng recently looked at the different ways one can change their Zoom background when using the popular video conferencing app. After the Coronavirus pandemic hit the world, most people have had to use one online meeting app or the other.
Zoom is among the most popular online meeting platforms besides Google's Meet, Microsoft Teams, and the world-renowned Skype platform. For people who value privacy above all else during online meetings, the option to change your background in Zoom is a fantastic feature.
Source: Legit.ng


